EDATE Function – Add Months to Date (Excel, VBA, G Sheets)
Download the example workbook
This tutorial demonstrates how to use the Excel EDATE Function in Excel to add or subtract months to a date.

EDATE Function Overview
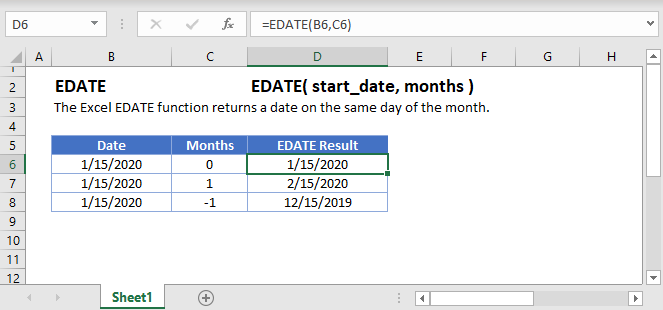
The EDATE Function Returns a date, n number of months away from a start date.
To use the EDATE Excel Worksheet Function, Select cell and Type:
![]()
(Notice how the formula input appear)
EDATE Function syntax and Inputs:
=EDATE(start_date,months)start_date – The start date in Excel serial number format or entered as a date with quotations (“s) surround the date. Example: You can not enter 11/12/2015 directly into the cell. Instead you need to enter “11/12/2015” or you would need to use the corresponding serial number: 42320. Alternatively, you can reference a cell with the date 11/12/2015 entered. Excel automatically converts dates stored in cells into serial format (unless the date is entered as text).
months – Number of months away from start date. Number can be positive (future) or negative (past).
EDATE Examples
Add Months to a Date
The EDATE Function is used to add months to a date:
Add One Month
=EDATE(B3,1) Add Six Months
=EDATE(B3,6) Subtract Months From a Date
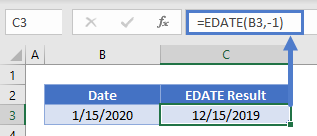
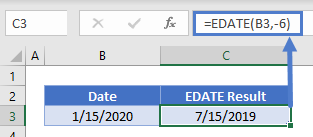
The EDATE Function can also be used to subtract months from a date.
Subtract One Month
=EDATE(B3,-1) Subtract Six Months
=EDATE(B3,-6) What About End of the Month?
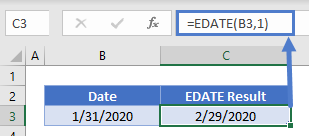
If the day of the start date is greater than the number of days in the end month, the last day of the month will be displayed:

The reverse is not true.

To ensure you get the last day of the month, you can use the EOMONTH Function instead:
=EOMONTH(B3,1) EDATE in Google Sheets
The EDATE Function works exactly the same in Google Sheets as in Excel:

EDATE Examples in VBA
You can also use the EDATE function in VBA. Type:
Application.Worksheetfunction.Edate(start_date,months)
For the function arguments (start_date, etc.), you can either enter them directly into the function, or define variables to use instead.