How to AutoFill Custom / Alphabetic Character Lists in Excel
This tutorial demonstrates how to autofill the alphabet and other custom lists in Excel.
Excel is able to recognize patterns and autofill a list based on a single entry. This is often used for days, months, numbers, etc. You can also create a custom list with your own data, and Excel will use it to recognize patterns for autofill.
Default Custom Lists
View Custom Lists
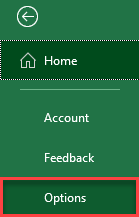
- In the Ribbon, go to the File tab and click Options.
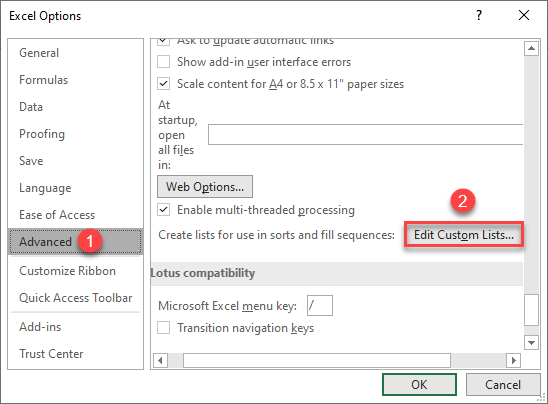
- In the Options pop-up screen, go to the Advanced tab, scroll down, and under the General group, choose Edit Custom Lists.
This brings up a new window displaying and editing custom lists in Excel. By default, Excel allows you to autofill months and days, both with full and short names (January and Jan; Monday and Mon).
The left side of the Custom Lists window shows these four default lists. If you click on the last list, you’ll see all the months in the List entries box to the right. That’s the source for autofilling a list of months in Excel.

Use a Default Custom List
To autofill with a default custom list (i.e., months), follow these steps:
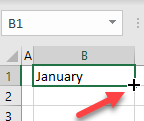
- Enter January in cell B1 and position the cursor in the bottom-right corner of B1 to get the fill handle.
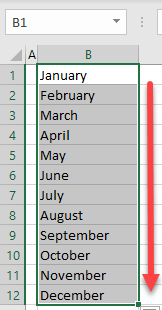
- Now drag the fill handle down to Row 12 to get all 12 months – in sequential order – in Column B.
Create a Custom List and Autofill
Type in a Custom List Directly
In the Custom Lists screen, you can also create a list with the letters of the alphabet.
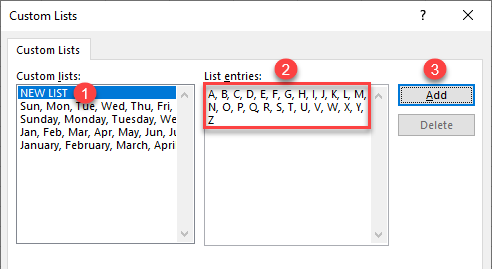
- In the Custom lists box on the left, click on NEW LIST.
- In the List entries box on the right, enter all list elements (i.e., A–Z). Separate each entry by comma, space, or line break (ENTER).
- Finally, click Add in order to add the new list.
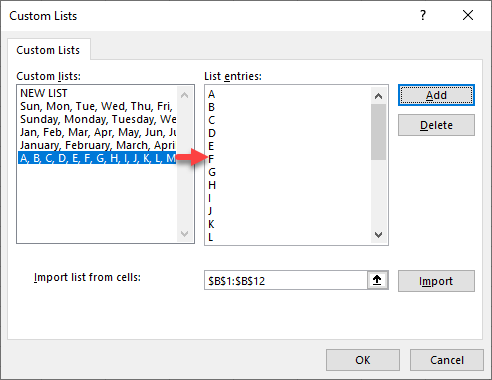
When you do this, a new list of letters is added to Custom lists, as you can see in the picture below.
Autofill the Alphabet
Now Excel is able to recognize an alphabetic pattern, so you can autofill the letters A–Z.
- Enter the letter A in cell B1 and position the cursor in the bottom-right corner of B1 to get the fill handle.
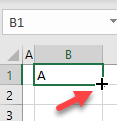
- Drag the fill handle down to Row 26 to get all 26 letters of the alphabet – in sequential order – in Column B.

Import a Custom List
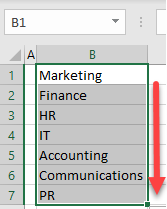
Another option to add a custom list is to reference cells in a worksheet. Say you have departments in your company in cells B2:B8, as pictured below, and want to make a custom list from that range.
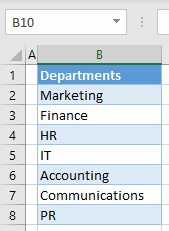
- First, go to the Custom Lists window, as shown above (File > Options > Advanced Options, and choose Edit Custom Lists).
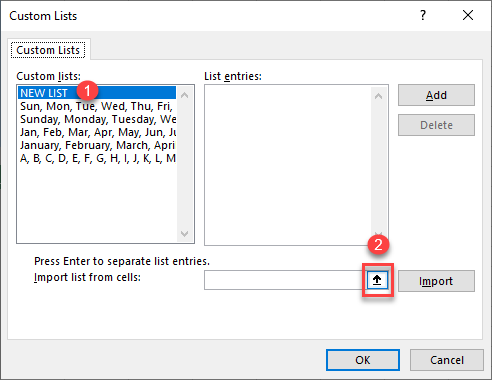
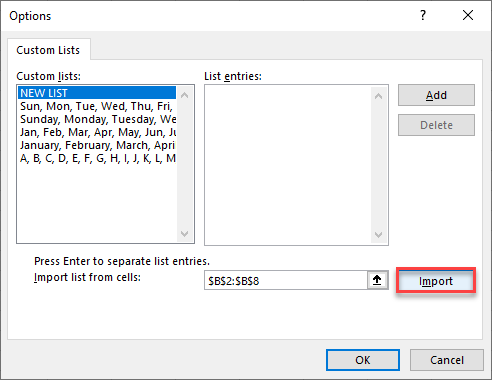
- Select (1) NEW LIST under Custom lists, then click on the (2) icon near the Import button to choose a range of cells.
- Select the range containing the new list items (B2:B8), and press ENTER.
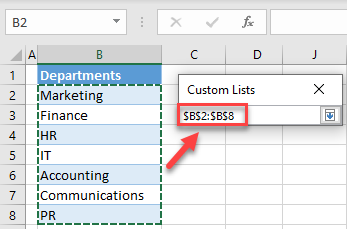
- This brings you back to the Custom Lists window. Click the Import button.
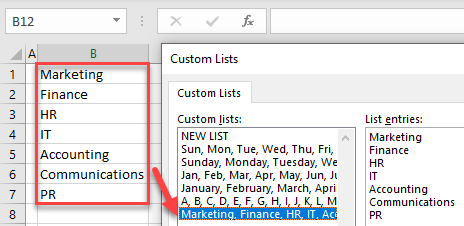
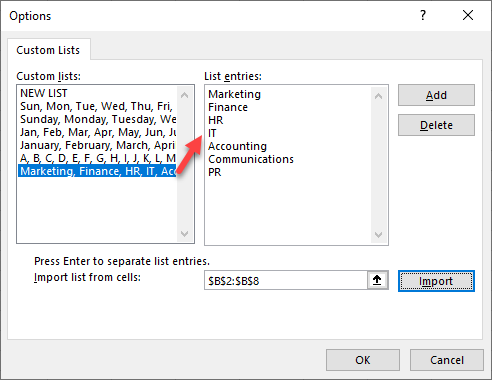
As shown below, the list of departments is now stored as a custom list.
Autofill a Custom Series
Now you can autofill the departments list based on one entry.
- Enter Marketing in cell B1 and position the cursor in the bottom-right corner of B1 to get the fill handle.
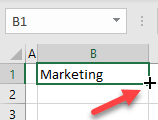
- Drag the fill handle down to Row 8 to get all eight departments from your new list – in sequential order – in Column B.
