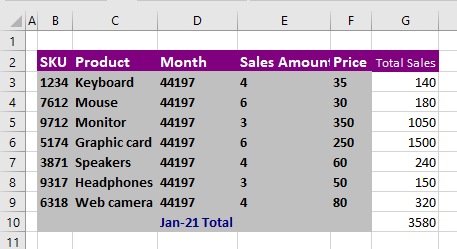
How to Use Automatic Formatting in Excel
This tutorial demonstrates how to use automatic formatting in Excel.
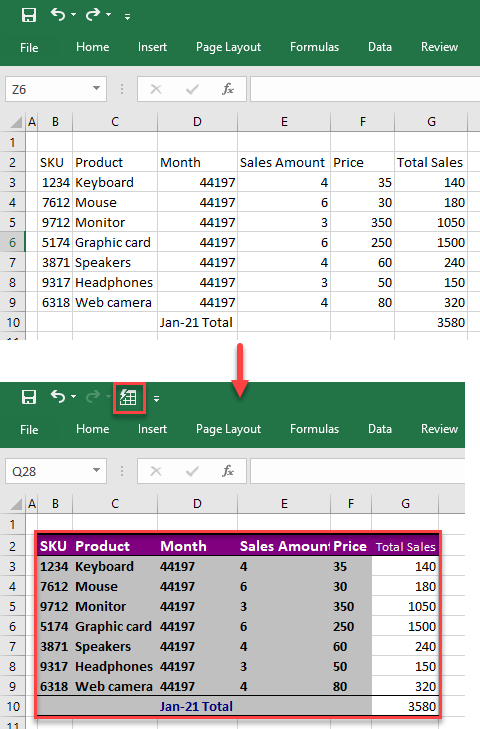
Add AutoFormat to Quick Access Toolbar
To use AutoFormat, first add it to the Quick Access Toolbar.
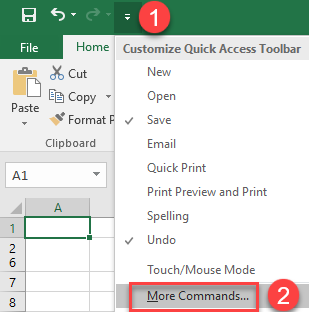
1. Click on the Quick Access Toolbar drop-down arrow and from the list, choose More Commands…
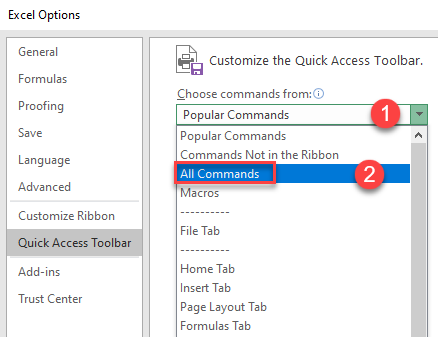
2. The Excel Options window will open. Click on Popular Commands under Choose commands from section and choose All Commands to display all available commands.
3. Scroll through the list of the commands and select AutoFormat… Then click Add.
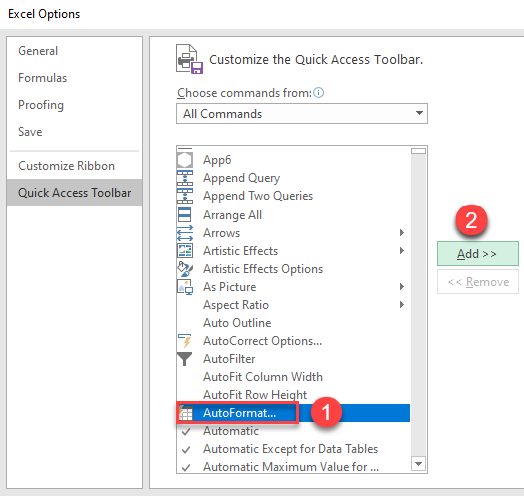
4. As a result, the AutoFormat command is added to the list. To finish, press OK.
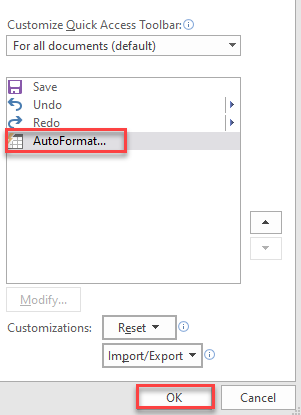
Now the AutoFormat command is on the Quick Access Toolbar.
![]()
Apply AutoFormat Style
1. To quickly apply AutoFormat style, select a range and in the Quick Access toolbar, click on the AutoFormat icon.
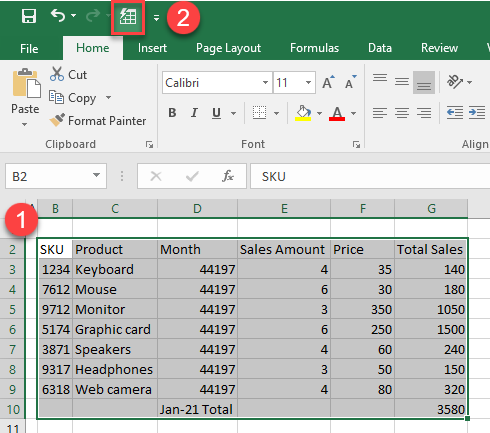
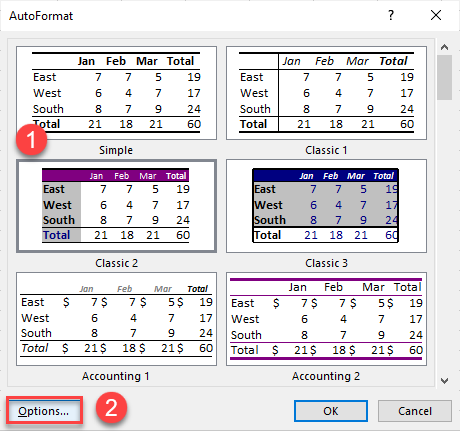
2. That opens the AutoFormat window. Select the style you want and press OK.
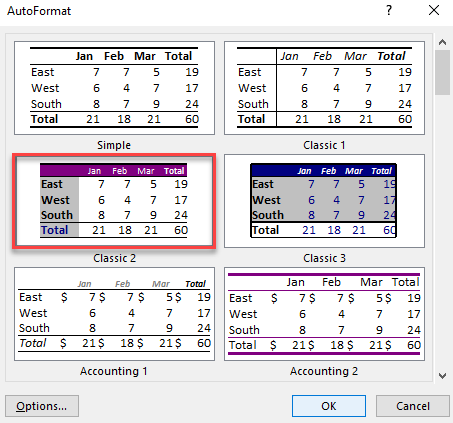
As a result, a new style is applied to the selected data.

Modify AutoFormat Style
If none of the available styles fit your needs, you can modify them.
1. In the AutoFormat window, select the style and click Options.
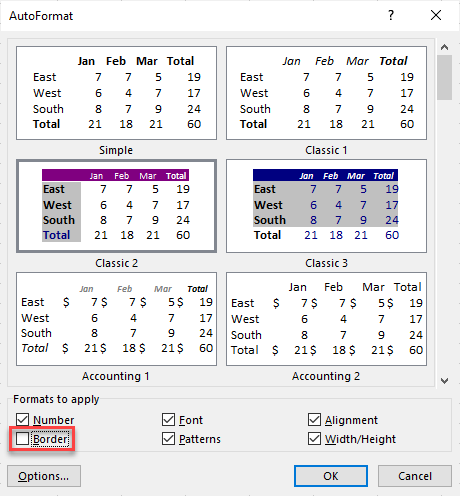
2. In the Formats to apply section clear the checkboxes for formats you don’t want to apply to your style (in this example, Border). Click OK.
Now the modified style is applied to the data.
