How to Make a Circle Around Something in Excel & Google Sheets
In this article, you will learn how to make a circle around something in Excel and Google Sheets.
Make a Circle Around a Cell
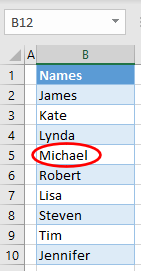
In Excel, you can circle a cell using the oval shape. Say you have the following list of names in Column B:
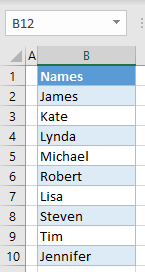
You can circle, for example, Michael in cell B5 with a red oval.
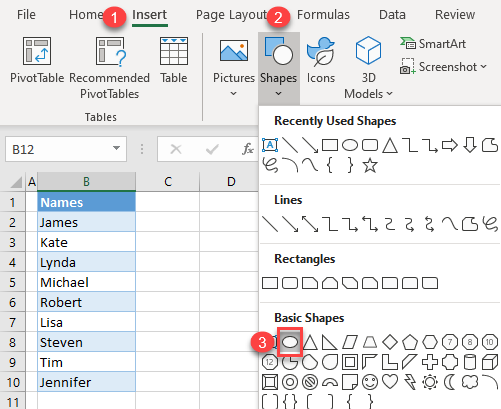
1. In the Ribbon, go to Insert > Shapes > Basic Shapes > Oval. Here you can choose to insert any shape offered (rectangle, circle, etc.). Any shape that you insert will be added to the Recently Used Shapes section at the top.
2. A small black cross appears. Position it where you want to start the shape and drag the cursor to form the shape.
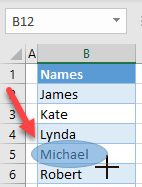
As a result of this step, the oval is inserted, but as you can see below, the fill color and line color are both blue. The shape needs to have a red line and transparent fill, so you can see the text from the cell underneath.
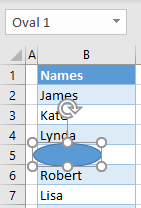
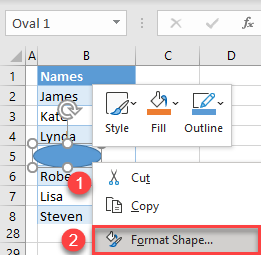
3. To change the oval’s appearance, right-click on the shape and choose Format Shape.
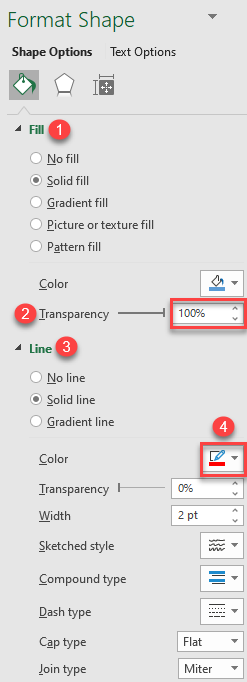
4. The Format Shape menu comes up on the right side of the screen. (1) Click Fill, and (2) set the transparency to 100% (this removes the fill color of the shape). Then (3) click Line, and (4) choose the line color (red).
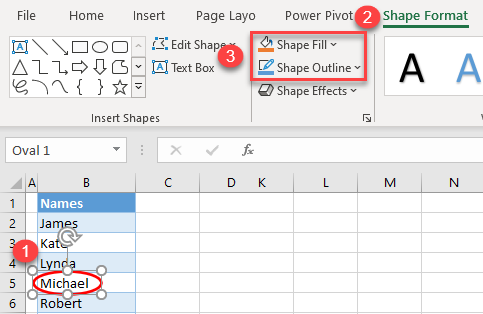
Finally, the shape is transparent with the red outline, and the text in B5 is circled. Similarly, you can also circle a range of cells by expanding the shape.

Another option to format the shape is to use the options in the Ribbon. To do this, click on the shape to select it, and in the Ribbon, go to Format Shape > Shape Fill (and Shape Outline).
Note: You can also insert a shape using VBA code.
Copy a Circle
Now let’s say you want to circle another name (for example, Jennifer) with the same shape (transparent with a red outline). To avoid formatting a new shape, you can copy the existing one and position it around cell B10.
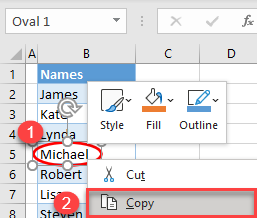
1. Right-click the shape, and choose Copy (or use the keyboard shortcut CTRL + C).
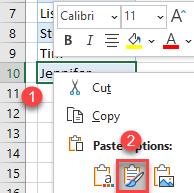
2. Right-click the cell where you want to paste the shape (B10), and choose Paste (Keep source formatting, or use the keyboard shortcut CTRL + V).
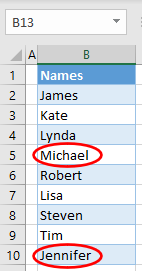
3. Now the shape is in the right general area, but it is not positioned ideally around the text in the cell. Therefore, you have to move it a bit. To do this, position the cursor on the shape, and when the four-sided arrow appears, drag and drop the shape.

As a result, you have a new shape copied from the original one.
Make a Circle Around a Cell in Google Sheets
You can also add a shape to circle a cell in Google Sheets.
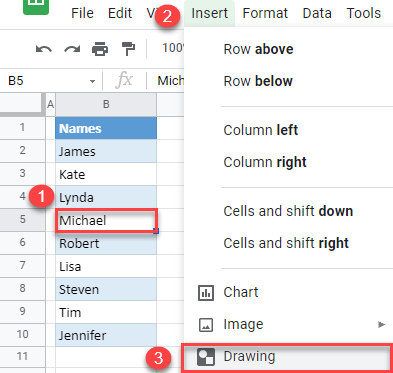
1. Select a cell where you want to add a circle (B5) and in the menu, go to Insert > Drawing.
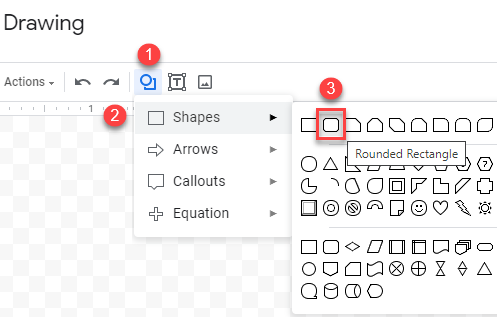
2. In the Drawing window, (1) click the shape icon, then (2) select Shapes and (3) choose a shape (e.g., Rounded Rectangle).
3. A black cross appears. Position it where you want to start your shape and drag the cursor to form the shape.

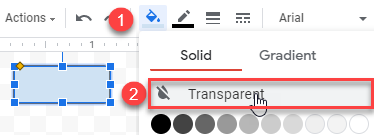
4. Click the fill color icon, and choose Transparent.
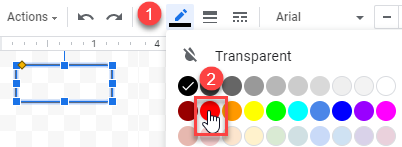
5. Click the border color icon, and select the color (red).
6. Now that the shape is created, and click Save and Close.
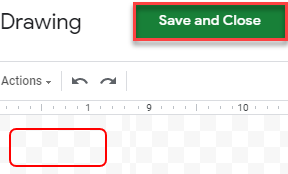
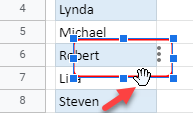
7. The shape is now inserted into the sheet, but not in the right place. Select the shape and position the cursor on it until the white hand appears. Now, drag and drop the shape to position it around cell B5 (Michael).
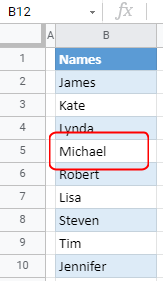
Finally, you have the red shape around the text.
Unfortunately, in Google Sheets, you can’t copy a drawing, so if you need several shapes, you’ll need to create them manually one by one.