Make All Rows / Columns the Same Size in Excel & Google Sheets
In this tutorial, you will learn how to make all rows the same height and all columns the same width in Excel and Google Sheets.

When working in Excel, we often have data exported from some other system and the general layout can be pretty messy. Therefore we may need to sort out the worksheet to be able to work with data. One thing that often needs to be done is to set all rows to the same height and all columns to the same width.
Make All Rows the Same Height
To make all rows the same height, follow these steps:
1. Select all cells in the worksheet. To do this, click on the arrow in the upper left corner of the gridlines.
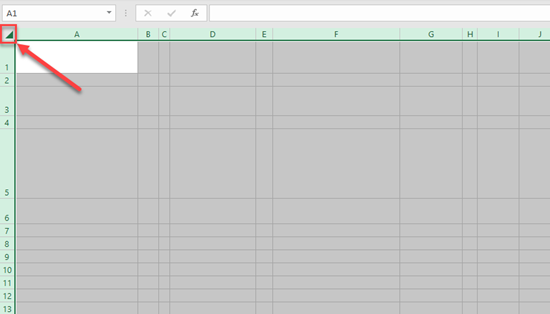
2. In the Ribbon, go to Home > Format > Row Height.

3. In the pop-up screen, (1) set Row height (for example, we set 20 here), and (2) click OK

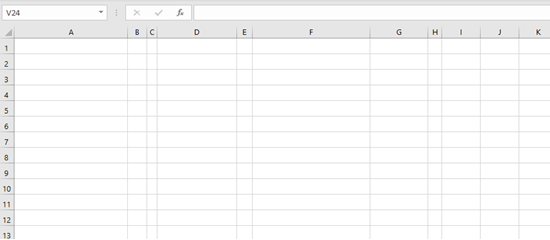
As a result, all cells in the worksheet now have the same height (20).
Make All Columns the Same Width
Similarly, we can make all columns the same width by following these steps:
1. Select all cells in the worksheet. To do this, click on the arrow in the upper left corner of the gridlines.

2. In the Ribbon, go to Home > Format > Column Width.
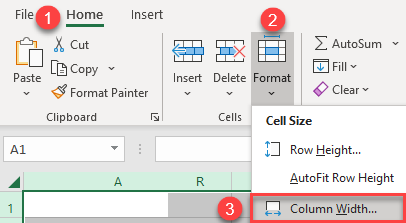
3. In the pop-up screen, (1) set Column width (for example, we set 15 here), and (2) click OK.
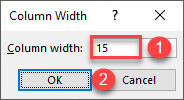
As a result, all cells in the worksheet now have the same height (15). Now the whole worksheet has cells with the same height and width.

Make All Rows the Same Height by Dragging
Another way to make all rows the same height is to drag a row boundary while all rows are selected.
1. Select all cells in the worksheet. To do this, click on the arrow in the upper left corner of the gridlines.

2. Now, click on the line between any two rows’ numbers and drag the cursor up or down to resize a row. This resizing will actually resize all the rows in the worksheet. While we’re dragging the cursor, we’ll see row heights in points and pixels, so we can set an exact value if we want.
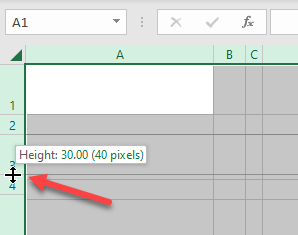
As you can see in the picture below, we set the same row height for all rows in the sheet.

Make All Columns the Same Width by Dragging
Just like sizing rows, as shown above, we can also make all columns the same width by dragging the cursor right or left.
1. Select all cells in the worksheet. To do this, click on the arrow in the upper left corner of the gridlines.

2. Now, click on the line between any column letter and drag the cursor left or right in order to resize a column. As we saw previously, this resizing will affect all the columns in the worksheet. While we’re dragging the cursor, we’ll see columns width in points and pixels, so we can set an exact value if we want.

Again, we achieved the same result and made all the columns the same width.

Note that macros can also be used to change row height and column width.
Make All Rows the Same Height in Google Sheets
To make all rows the same height in Google Sheets, do the following:
1. First, select Row 1 by clicking on its header and press CTRL + SHIFT + DOWN to select all visible rows.
2. Next, (1) click on any row heading (numbers) and (2) press Resize rows 1-1000.
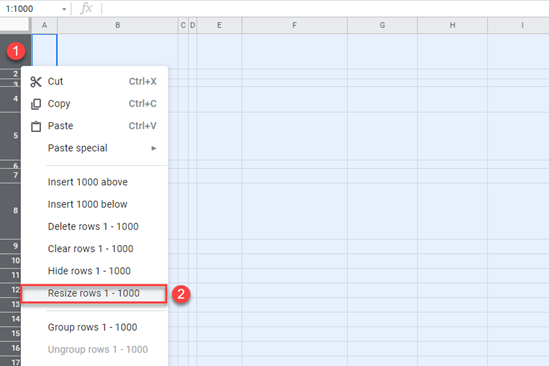
3. In the pop-up screen, (1) select Specify row height and (2) set row height, for example, 25. (3) Click OK.
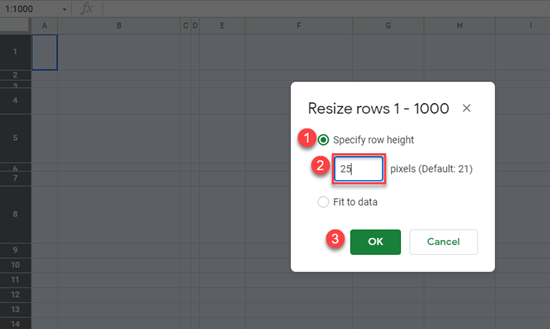
As a result, all cells have the same height (25).
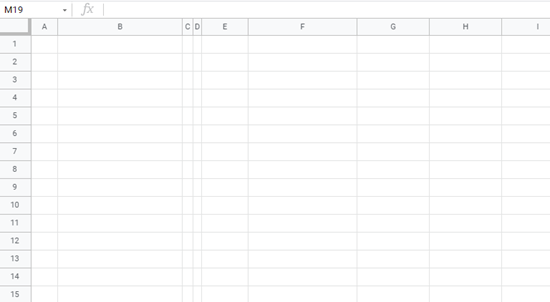
Make All Columns the Same Width in Google Sheets
Now we can also make all columns the same width in Google Sheets.
1. First, select Column A by clicking on its header and press CTRL + SHIFT + RIGHT in order to select all visible columns.
2. Next, (1) click on any column heading (letter) and (2) press Resize columns A-Z.
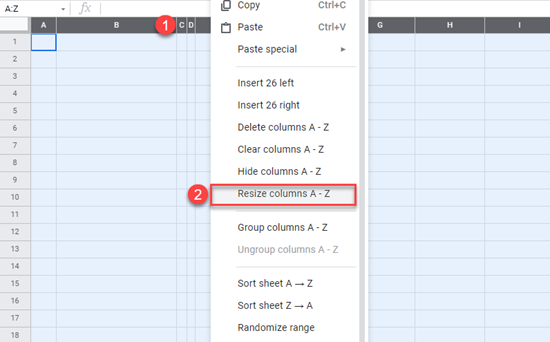
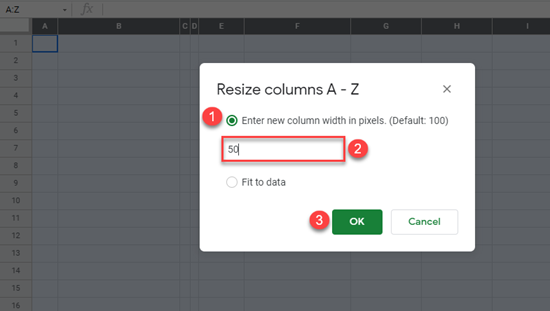
3. In the pop-up screen, (1) select Enter new column width in pixels and (2) set column width, for example, 50. (3) Click OK.
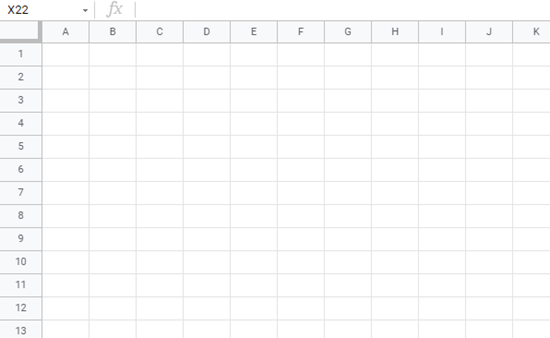
Finally, all cells in this sheet have the same height and width.
We can also resize all rows or columns in Google Sheets by dragging. This works exactly the same as shown above for Excel.