Rotate Data Tables (Row to Column) in Excel & Google Sheets
In this tutorial, you will learn how to rotate data tables in Excel and Google Sheets.
Transpose Rows to Columns
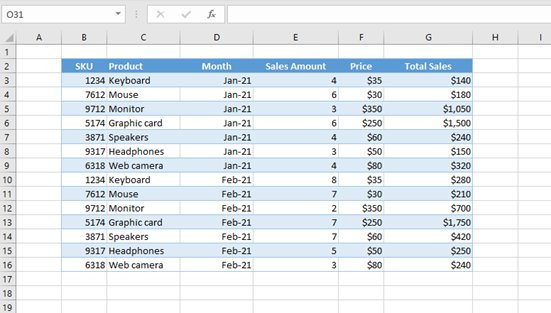
Excel allows you to rotate data rows and columns by using the copy-paste transpose option. To be transposed, data must first be formatted as normal range. So, if you want to transpose an Excel table, you’ll need to convert it to a range first. Say you have the following sales data in Excel.
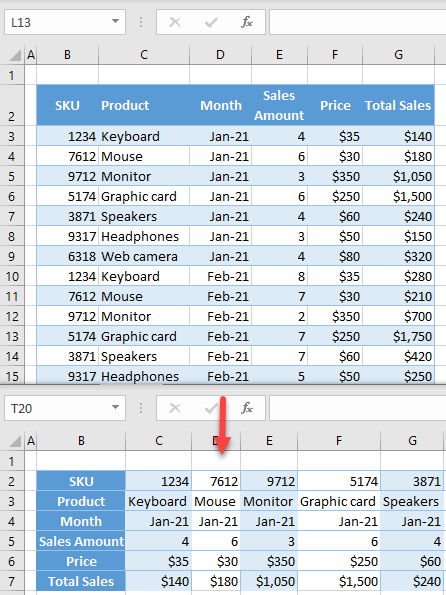
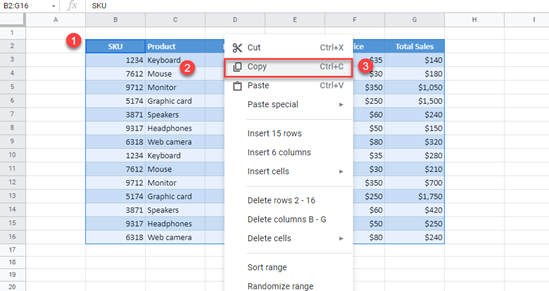
1. To switch rows and columns, first select all data (B2:G16), then right-click anywhere in the selected area and choose Copy (or use the keyboard shortcut CTRL + C).

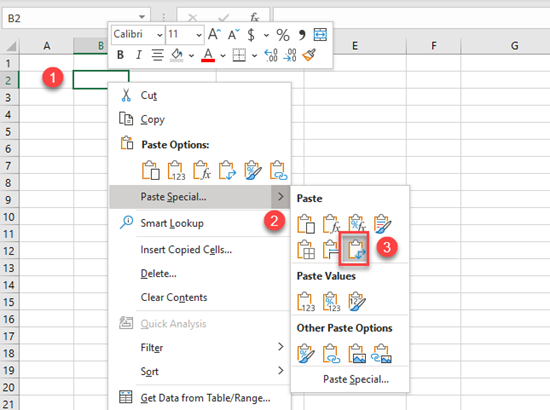
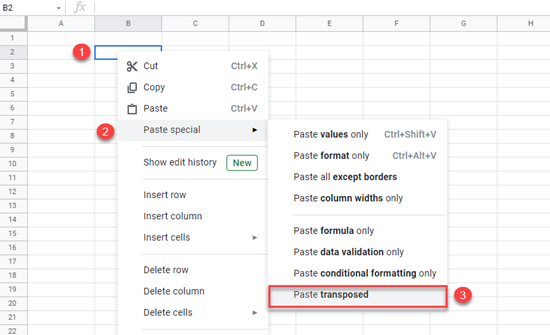
2. Now (1) right-click in the cell where you want the data to be pasted. This can be in the same sheet, another sheet, or in the new workbook. In this case, choose B2 in another sheet.
Next, (2) click on the arrow beside Paste Special, and (3) choose the Transpose icon.
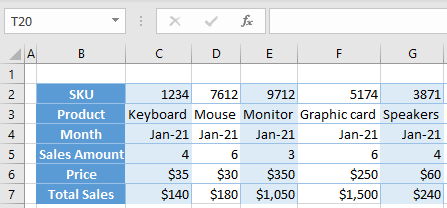
As a result, the table’s rows and columns are switched; now SKU, Product, Month, Sales Amount, Price, and Total Sales are row headings instead of column headings.
Transpose Rows to Columns in Google Sheets
Rotating a table in Google Sheets works in much the same way.
1. First, select all data (B2:G16), then right-click anywhere in the selected area and choose Copy (or use the keyboard shortcut CTRL + C).
2. Now right-click in the cell where you want the data to be pasted. Then click on Paste Special, and choose Paste transposed.
You get the same result as in Excel; columns and rows are transposed.
