How to Save a Table as an Image in Excel
In this tutorial, you will learn how to copy and save a table as an image in Excel.

Copy a Table as a Picture
Let’s say that we have some data in Excel, formatted as a table (using the shortcut CTRL + T) and we need to copy this table to some other sheet, PowerPoint presentation, or Word document. Often, we just need to have a table copied as a picture to be displayed in some other document type. To achieve this, we need to follow the next steps:
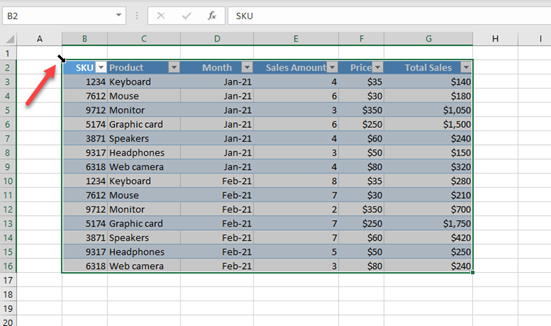
1. First, we need to position the cursor in the upper left corner of a table until the diagonal arrow appears, and then click to select the entire table.

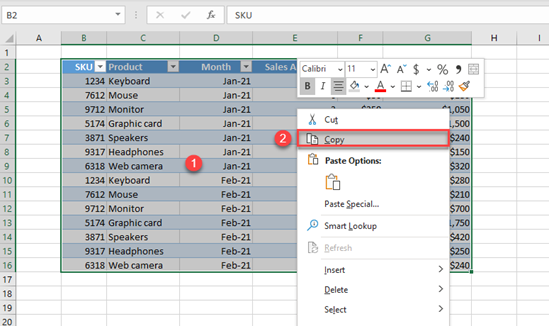
2. Now, when the table is selected, we need to right-click anywhere in the selected area, and choose Copy (or use the keyboard shortcut CTRL + C).

3. When we have the table copied in the clipboard, we can (1) move to where we want to copy the table as a picture. In our case, we’ll move to Sheet2 of the Workbook, but we could also go to some Word or PowerPoint document.
Here, we need to (2) right-click where we want to copy the picture, then (3) click on the arrow beside Paste Special, and (4) choose Picture.

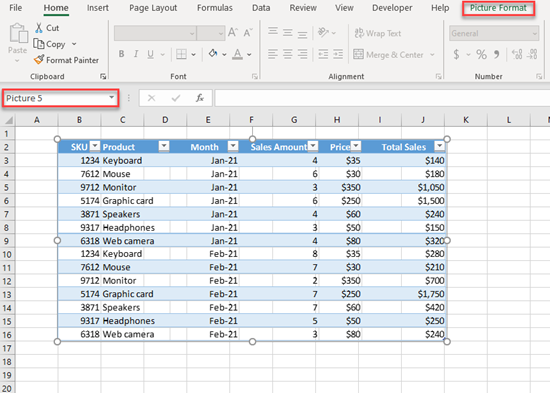
As a result, we get the table copied as a picture. If we click anywhere on it, we’ll see in the name bar a generic picture name (Picture 5), and also in the Ribbon, the Picture Format tab will appear.

Save the Table as a Picture
If you want to save a table as an image to your computer, you need to repeat the steps to select and copy the table from above and paste it to some drawing program (e.g., Paint) to save it.