How to Add Lines (Set Borders) in Excel & Google Sheets
This tutorial demonstrates how to add border lines in Excel and Google Sheets.
Set Borders From the Ribbon
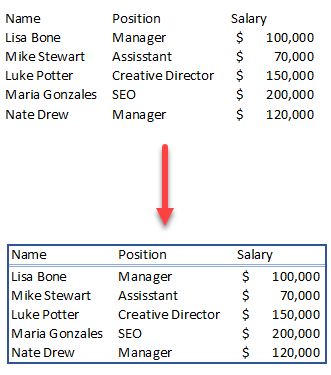
A border is a line – set over the gridline – around a cell or range of cells. You can use it to emphasize certain data, separate different sections, etc. Worksheets are often full of information, so setting borders is useful in drawing attention to important information and making your spreadsheet look more organized and presentable. The fastest way to make borders in Excel is to use one of the preset options from the Ribbon.
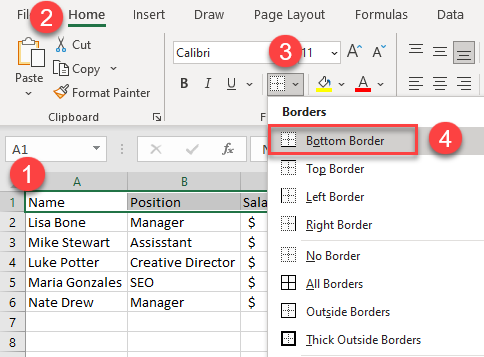
- First, select the cell or range where you want to add borders (in this example A1:C1).
- Then in the Ribbon, click on Home.
- In the Font group, click on the arrow next to the Borders button.
- From the drop-down menu, choose the border type you want to apply.
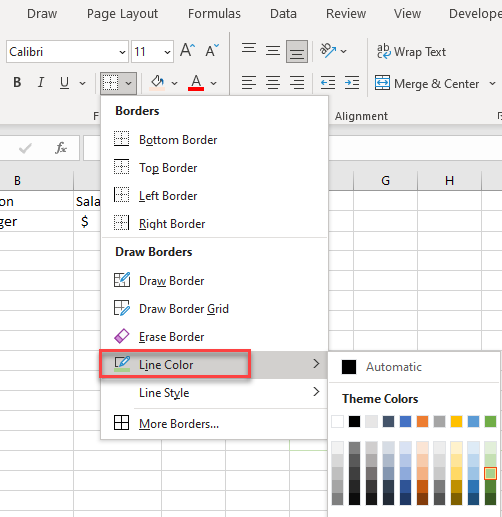
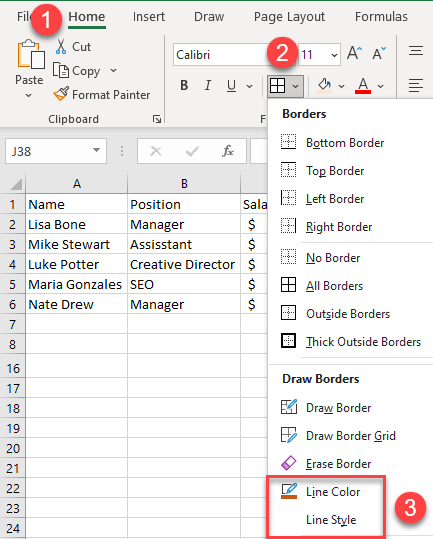
- To apply a line color other than the default, choose the desired Line Color under Draw Borders, and then select the border type.
Now you have borders around the cell or range of cells you selected (here, A1:C1).
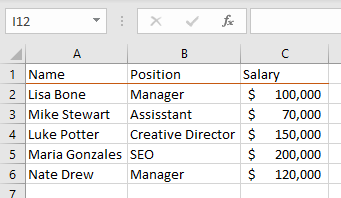
Note: You can also use VBA code to add borders.
Set Borders – Format Cells Dialog Box
Using the Format Cells window is the best way to add borders to cells, because it gives you access to all settings in one place, as well as a diagram preview.
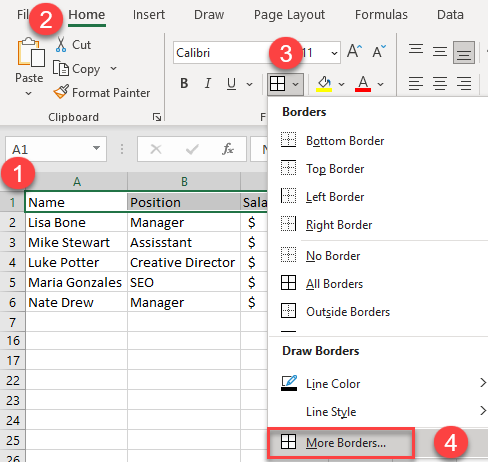
- First, (1) select the cell or a range of cells to which you want to add borders. Then in the Ribbon, (2) go to Home and (3) click on the borders button. From the drop-down menu, (4) choose More Borders…
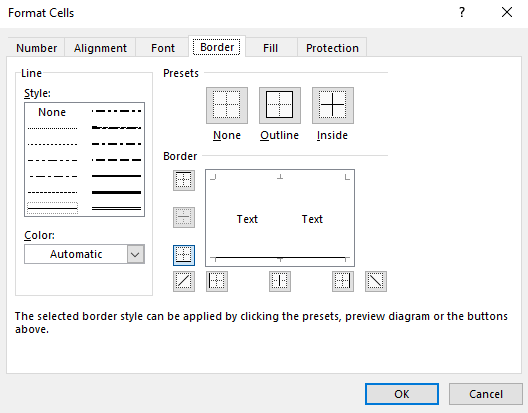
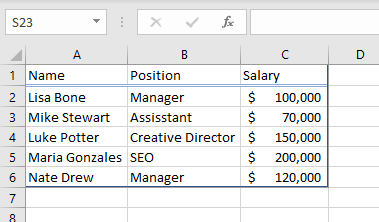
- The Format Cells dialog box appears. Choose the style and color of the line, then add the borders you want. You can choose to use presets or to use individual elements such as bottom border, top border, etc. This example uses outside borders for the A1:C6 and a bottom double border for A1:C1.
The diagram preview displays every change immediately. Check that the preview matches the borders you want, and click OK.
As a result, the borders are added.
Draw Borders
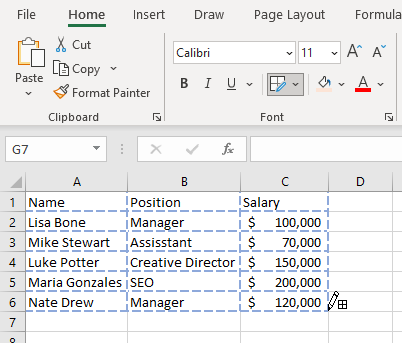
Alternatively, instead of selecting the cells first and then choosing from the range of the options, you can draw borders directly on the worksheet.
- First, in the Ribbon (1) go to Home, then (2) click on the borders button, and in the drop-down menu (3) choose Line Color and Line Style.
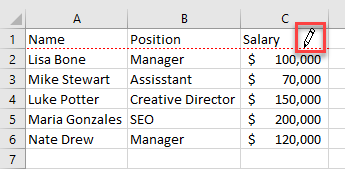
- After that, the draw border mode is activated, and the cursor changes to a pencil. Now you can start to draw individual lines.
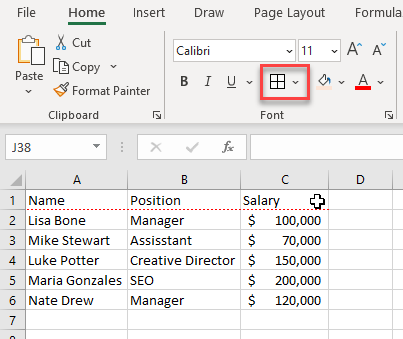
- To stop drawing borders, just click on the borders button. The cursor changes back to a white cross.
Draw Multiple Borders at Once
If you don’t want to draw individual lines, under Draw Borders group commands, you can choose between two drawing modes: Draw Border or Draw Border Grid.
By choosing the Draw Border mode, you’re able to drag a pencil around the range of cells you want to engird.
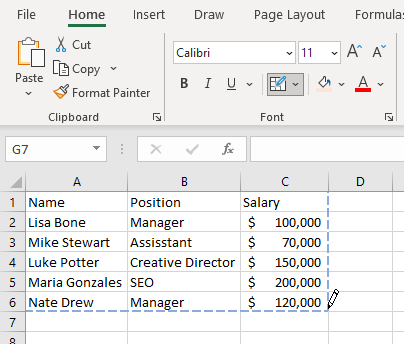
If you choose Draw Border Grid mode, all cells in the selected range will have borders around them.
Set Borders Shortcut
You can also use a keyboard shortcut to add a single border around a range of cells.
- Select the range of cells.
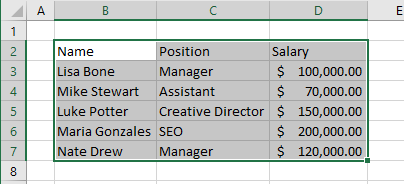
- Press CTRL + SHIFT + &.
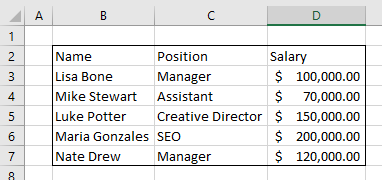
- An outside single border is placed around the selected cells.
Set Borders in Google Sheets
- First, select the cell or range of cells where you want to add borders.
- In the Toolbar, click the borders button.
- If you want to apply line color or type other than the default, click the border color button to change the color.
- Click border style to change the type of border line.
- Finally, choose the border(s) you want to apply.
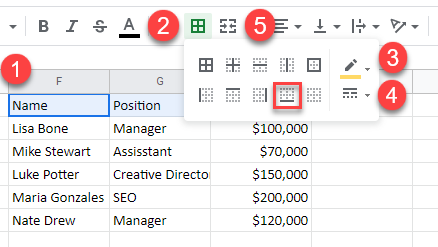
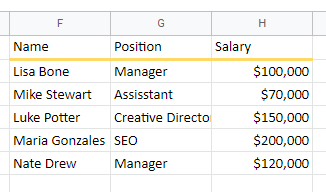
Now the borders are added, as shown in the picture below.
