Data Validation – Date / Time Format in Excel & Google Sheets
This article will demonstrate how to use Data Validation to restrict entry to a date or time format in Excel and Google Sheets.

Data Validation to Allow Dates
Using the Data validation feature in Excel, we can restrict the entry of data into certain cells to ensure that only dates are entered into the cells. We can further restrict the time frame of these dates insofar as they would need to be between a start date and an end date.
First, (1)select the cells where you want the Data validation applied and then, (2) in the Ribbon, select Data> Data validation > Data Validation.

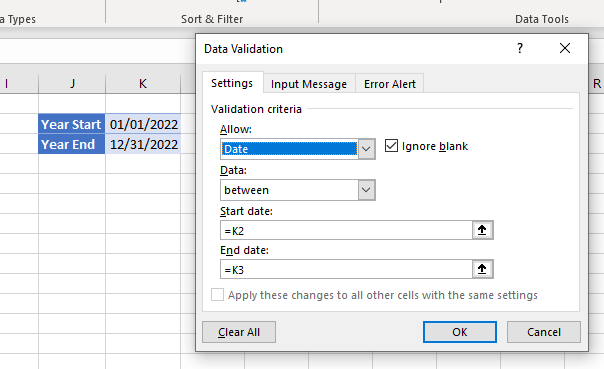
In the Settings tab, set the Validation criteria. Set the Allow to “Date”, and then from the Data drop select “between”. You can then click on a cell with the starting date and one with the ending date to complete the validation criteria.
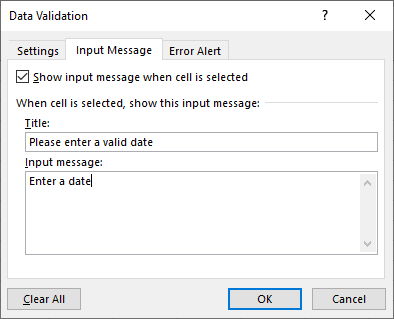
Next, click on the Input Message tab and make sure that “Show input message when cell is selected” is checked. Enter in the title and input message that you require.
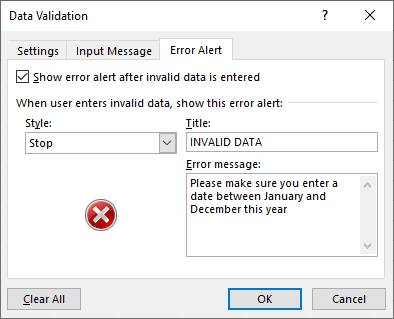
Finally, click on the Error Alert tab. Make sure that the “Show error alert after invalid data is entered” check box is ticked, and then select the Style of alert you require. You have a choice of Stop, Warning and Information. Type in the title and error message you require, and click on OK.
Now, when the cells where the validation is active are highlighted, the input message will show.
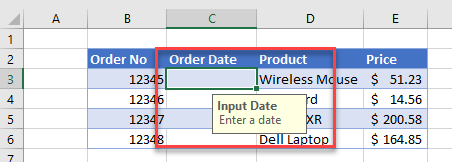
If you try to enter any other type of data, or an invalid date type (such as your date as text), your error message will appear.

You can however enter the date as a serial number.
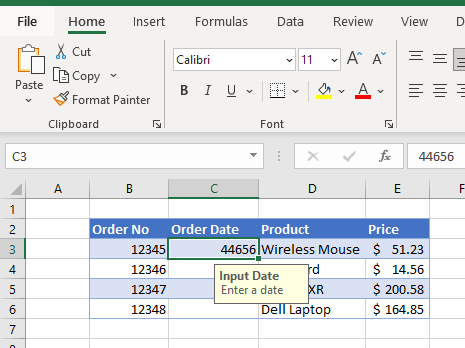
If you cell is formatted for a General number type instead of a Date format, you will still be able to enter a valid date serial number which will then be shown in the cell when you press enter.
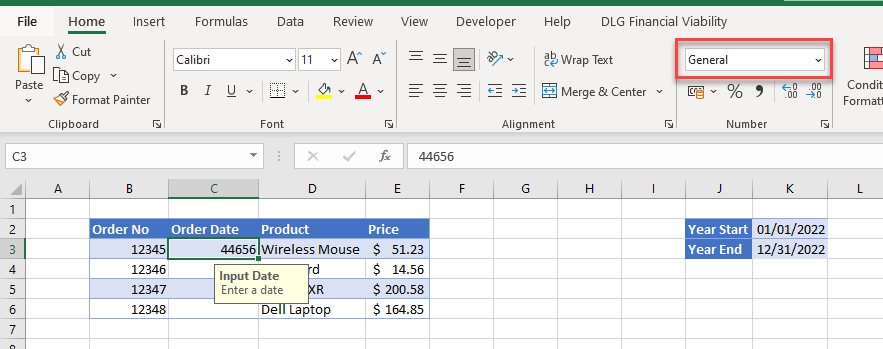
Once that is formatted for Date, the date will show.

NOTE: if you do not want to restrict the start and end dates and times in Excel, you can put in start and end dates that are wide apart such as 01/01/1900 and 01/01/2300 – this will basically allow the user to enter any valid date.
Data Validation to allow Time
You can also restrict the values entered into the cell to a time rather than a date.
Highlight the cells where you wish to apply the Data validation, and then, in the Ribbon, select Data > Data Tools > Data Validation > Data Validation.
In the Setting tab, from the allow drop down, select Time and then sett the start time and end time after selecting “between” from the Data drop down list

Enter an Input message and / or Error Alert and then click OK to apply the data validation.
If you then enter a time that is not within the required time frame, or you enter data that is not in time format, an error will occur.

As with dates, you can put extend the start time and end time to include all valid time values.

Data Validation for Date Format in Google Sheets
You can also set a Data Validation rule in Google sheets to make sure that you enter a date into a cell. You cannot however test for time being entered.
The one major difference between Excel and Google Sheets is that in Google Sheets, you can test if the date data entered is an actual valid date – the date does not have to be between a start and an end date like it does in Excel.
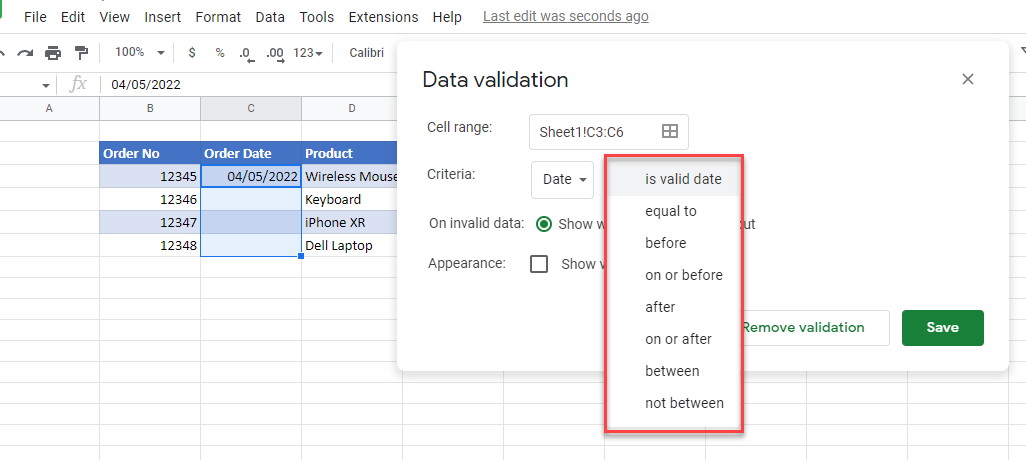
Select Data validation from the Data tab in the Ribbon, and then select Date from the Criteria drop down. You can then select from the options available (eg select “is valid date” to just restrict the entry to a date).
