How to Insert Picture Into Header in Excel & Google Sheets
This tutorial shows how to insert a picture into the header or footer in Excel and Google Sheets.
Insert Header
To insert a header in Excel, follow these steps:
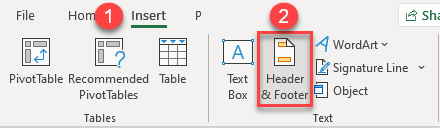
- Click on the Insert tab and choose Header & Footer from the Text group.
- This opens the Header & Footer tab.
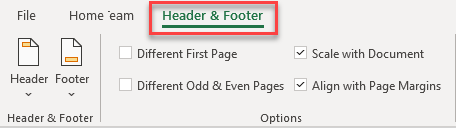
- You see three boxes at the top of the page.The central box is selected by default, but if you wish the header to appear in the top right or top left corner of the page, click the right or left box and enter information there.

Insert Picture Into Header
Now that the header is created, it’s time to insert a picture.
- Select the header box where you want to insert a picture.

- In the Ribbon go to Header & Footer > Picture (from Header & Footer Elements).

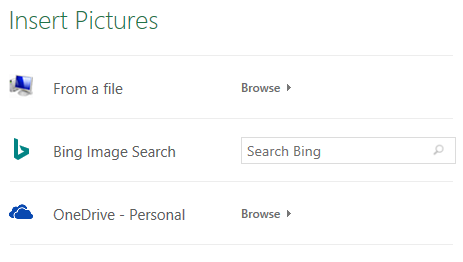
- When you click on Picture, the Insert Pictures box will appear. Choose where you want to import your picture from.
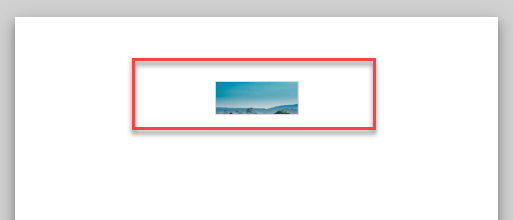
When you import your picture, it’s inserted in the header.
Insert Picture Into Header in Google Sheets
In Google Sheets, you can’t insert a picture in the header, but you can use a workaround by freezing the first row, which will then serve as header.
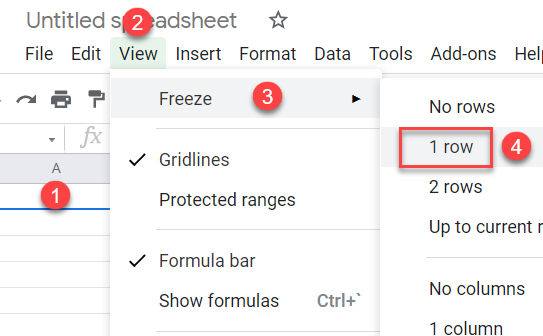
- Select a cell in the first row, then in the Menu, go to View > Freeze > 1 row.
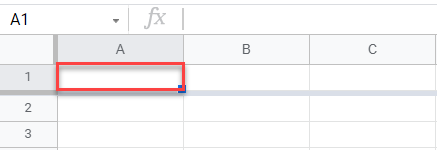
- Now, you have your “header.” Select cell A1 (or wherever you want to insert your picture).
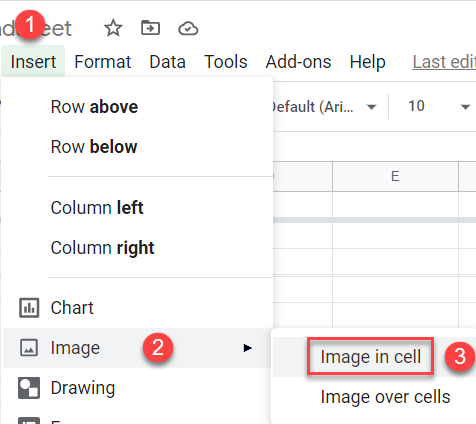
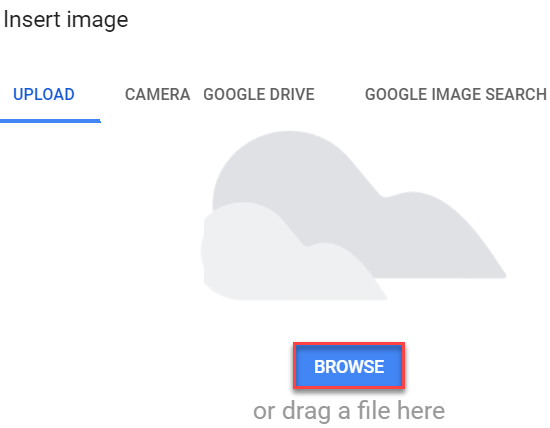
- Next, insert a picture in the header. In the Menu, go to Insert > Image > Image in cell.
- The Insert image window appears. Choose Upload, then Browse to upload the picture you want to insert.
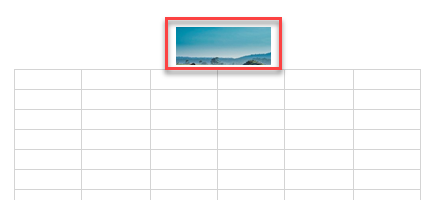
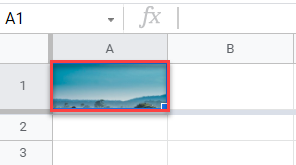
The picture appears in the cell you selected.
- To see the final result, go to print view and the picture in the header will appear at the top of each page you print.