Insert or Remove Headers & Footers in Excel & Google Sheets
This tutorial shows how to insert and remove headers and footers in Excel and Google Sheets.
Insert a Header in Excel
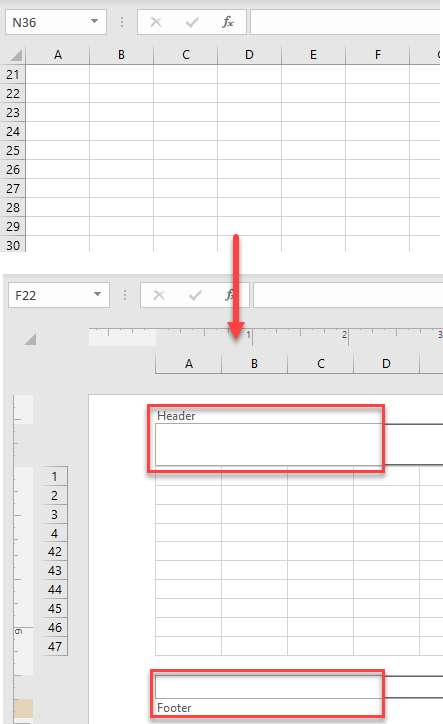
In Excel, headers and footers appear at the top and bottom of each page you print. To insert a header in Excel, follow these steps:

- First click on Insert tab and choose Header & Footer from the Text group.

- This opens the Header & Footer tab.

- Now, you can see three boxes at the top of the page. The center box is selected by default, but if you want the header to appear in the top right or top left corner of the page, click the right or left box and enter your information there.

For more on entering header content, see How to Insert Picture Into Header in Excel and Google Sheets.
- To leave the header area, just click anywhere in the worksheet.
Insert a Footer in Excel
Just like inserting a header in Excel, you can insert a footer in few easy steps.

- In the Ribbon, go to Insert > Header & Footer (from the Text group).

- This sends you to the Header & Footer tab.

- In the Header & Footer tab, click on Go to Footer to navigate directly to the footer. Or you can scroll down to the bottom of the page.

- Just as with the header, the footer has three boxes, and the center box is selected by default. If you want your footer to appear in the right corner of the page then put information in the right box, or if you want it to be in the left corner put information in the left box.

- When you are done editing the footer, just click anywhere in the worksheet to exit the footer area.
Remove Headers and/or Footers
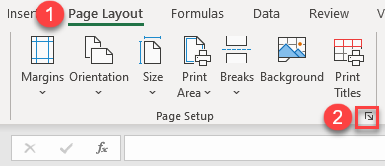
- To remove the header and footer, first exit the header and footer area. To do that, click anywhere in the worksheet. Then in the Ribbon, go to Page Layout and activate Page Setup Dialog Box by clicking on the arrow in the bottom right part of the Page Setup group.
- In Page Setup Dialog Box click on Header/Footer, to remove header choose none and to remove footer also choose none.
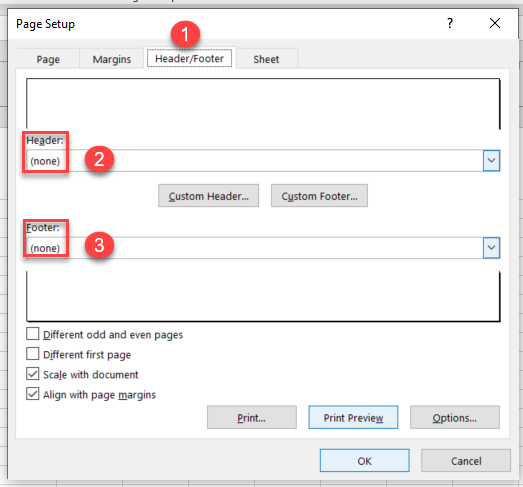
As a result of Step 2, the header and footer is removed from the worksheet.
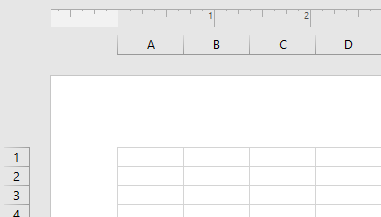
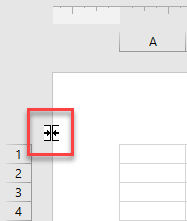
- To hide white space, move your cursor to the left and when it changes into another icon click on it.
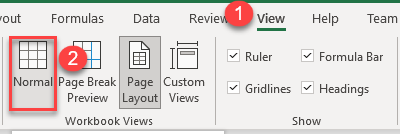
- To restore normal view, in the Ribbon, go to View > Normal (in the Workbook Views group).
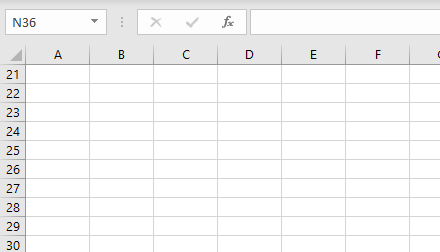
As a result of Step 4, the worksheet returns to the normal view.
Insert Headers and Footers in Google Sheets
In Google Sheets, you don’t see the header or footer until you go to print your spreadsheets, so if you want to add headers or footers, follow these steps:
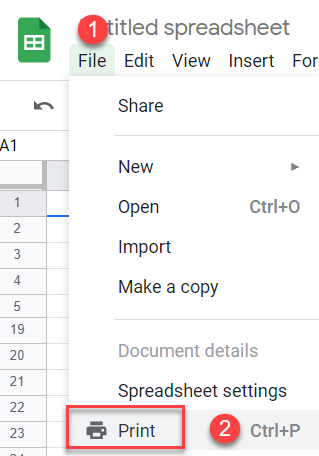
- The first step is to go to File in the menu and click on Print (or you could use the keyboard shortcut CTRL + P) to open the Printer Settings Menu for your document.
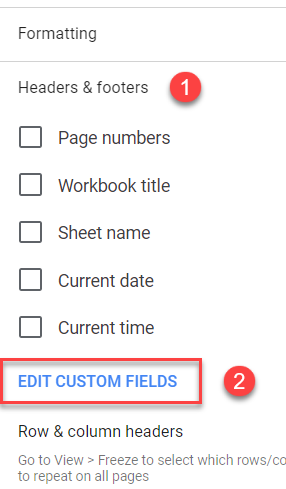
- After you open the Printer Settings Menu, click on Headers & footers. A list of available options for both headers and footers appears. To use custom text instead, choose Edit custom fields.
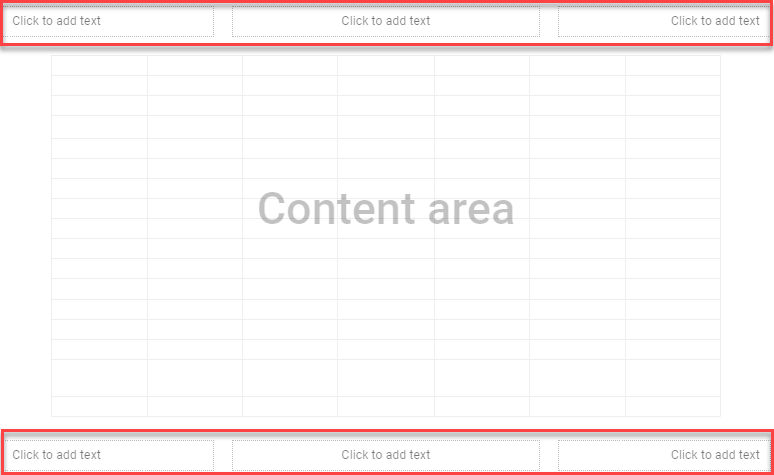
- After you click on Edit custom fields, the print view disappears. Now you can edit the text boxes in the header and/or footer.
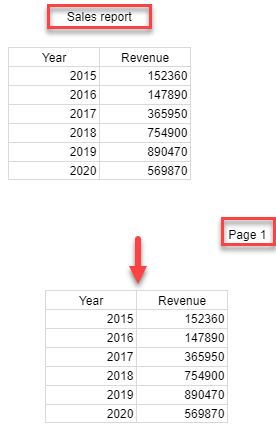
- When you are done editing, just click Confirm in the top right corner of the page.

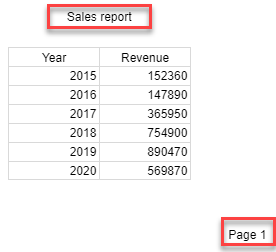
As a result, you will have a header and footer in your worksheet.
Remove Headers and Footers in Google Sheets
- To remove the header and footer in Google Sheets, click File in the menu, then Print to open the Printer Settings Menu for your document.

- The Printer Settings Menu appears. In it, go to Headers & footers. To remove a header or footer, uncheck any checked options in the list of available options, or if you made a custom header or footer, go to Edit custom fields and manually delete all of the information you entered in the header and footer boxes.

- After you do that, click on the Confirm button in the top right corner of the page.

As a result, your Google Sheets worksheet won’t have a header and footer any longer.
