Add a Data Validation ToolTip in Excel & Google Sheets
In this tutorial, you will learn how to add a data validation tooltip in Excel and Google Sheets.
Add Data Validation ToolTip in Excel
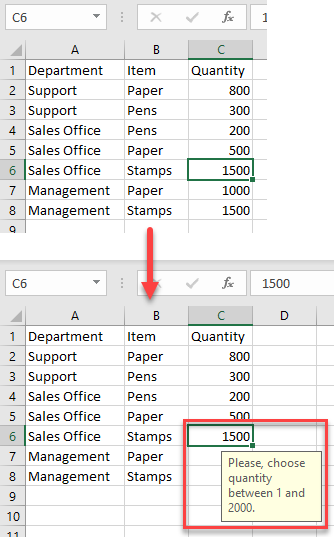
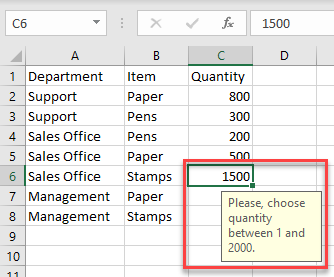
ToolTips (not to be confused with ScreenTips) are messages that appear as a yellow box when a user selects a cell with a data validation rule. You can add a tooltip when you create a data validation rule.
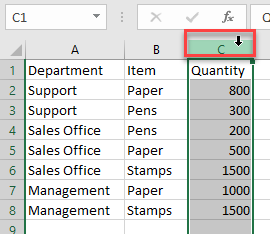
- First, choose where you want to insert a data validation tooltip. Then, select the data you want to restrict (for example, Column C).
- To open the Data Validation window, in the Ribbon, go to Data > Data Tools > Data Validation.

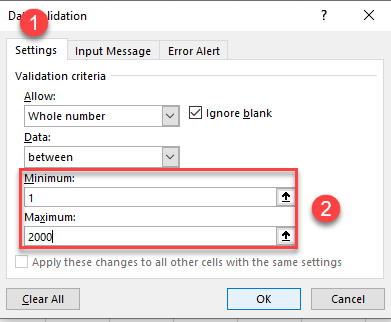
- The Data Validation Window will appear. Go to the Settings tab, and set the Validation criteria for the selected data (here, Whole Number between 1 and 2000).
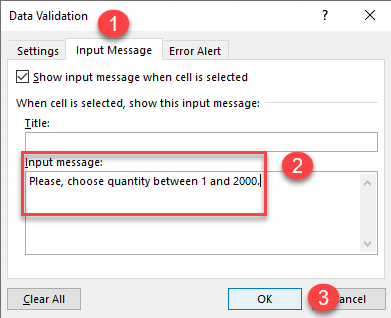
- To add a data validation tooltip, click on Input Message. In the Input message section, type the text you want to appear. When you’re done, click OK.
As a result, when you click on a cell with data validation (C6), the tooltip is displayed.
Add Data Validation ToolTip in Google Sheets
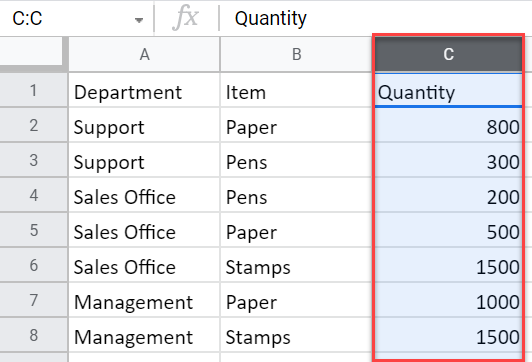
- To achieve the same thing in Google Sheets, first select the data on which you want to display a data validation tooltip.
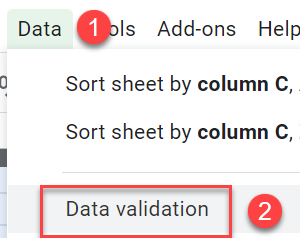
- In the Menu, click on Data > Data validation.
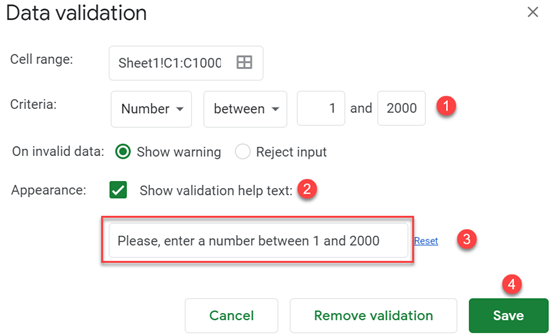
- The Data Validation window will appear. (1) Set the validation criteria for selected data (a number between 1 and 2000). In the appearance section, (2) check Show validation help text, and (3) enter the message you want to display. Finally, (4) click Save.
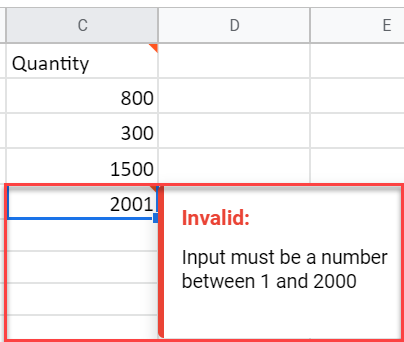
Now if you enter invalid data in a cell with data validation (C5), the tooltip will appear with the message you entered.
